Showing posts with label Blogspot. Show all posts

Saturday, January 25, 2014

How To Add Facebook Comments To Your Blog

As you have probably noticed, more and more blogs, e-commerce websites and all kinds of applications online are taking Facebook integration more seriously. One of those popular elements is Facebook Comments.
But what you probably don’t know is that it’s not that complicated to add them to your blog yourself. In fact, I’m pretty sure you can be rocking Facebook Comments on your blog in the next hour or so. I’ll tell you how to do it in just 5 steps.
Before we start this mini-tutorial, let’s go over a couple of things…

What are the Pros?

There are a few reasons you might be considering the possibility of integrating Facebook Comments into your blog posts.

Exposure
  • Comments are easily published on the commenter Facebook Wall Timeline. This helps increase awareness, you are now in front of that user’s network of friends
  • The comment is posted on the user’s Timeline along with a thumbnail, headline and excerpt from the blog post as if the user was sharing your post
Engagement
  • Replies to those comments can take place either on the same post in your blog or on that user’s Facebook Timeline. This motivates conversation not only inside your blog but also on Facebook
  • Those comments can also be Liked by other users
Authentication
  • Most people are on Facebook and are already signed up to their account, which means they don’t need to authenticate to any commenting system. Users that are not logged to Facebook can log in from your post comments
  • Most people are familiar and trust Facebook

And the Cons?

The issue for me is not that this is a 3rd-party solution living in your blog. If you think about it, most of us bloggers already use 3rd-party apps to support our comments. I use Disqus in this blog but you’ve seen others like Livefyre or IntenseDebate. Very few blogs still rely on the WordPress native comment system.
But in this case you need to consider that your comment system belongs and it is a vital element of a social network.
  • Not everybody is in love with Facebook, some people actually prefer Google+, some are hardcore Twitter users. The invitation to interact via a network that is not their preference might not be welcomed with open arms
  • Totally depending on Facebook might not be such a good idea, you know how they change things around from time to time. What if tomorrow they dramatically change one of those elements you have deeply integrated into your blog? #goodtimes
That’s why some blogs offer the the possibility to comment through Facebook while they still have a more universal commenting system.
So there you have it, advantages and disadvantages I see and share with you to help you make a better decision.
Are you ready to get started? Let’s do this thing then!

1. Become a Facebook Verified Developer

Becoming a Facebook Verified Developer is very easy, don’t let the fancy terminology scare you. Let me take you step-by-step:
Facebook Developers Website
  • Go to the Facebook Developer website
  • click on “Apps” on the top blue navigation
  • Click on “Create an App” (this will be as far as you can go without being a developer)
  • You will see a “Your account must be verified to perform that action” message and you will be offered two methods: Phone or Credit Card
  • If you go with the phone option, you will provide your number, Facebook will send you a code via text and you will submit that code back to them. Boom! You’re in business
  • If you choose Credit Card just provide your information and follow the instructions. Sometimes this is the best option, specially if you’re outside the US
That’s it, you wanted more? Call your spouse and share the news: You are a Facebook Verified Developer
Cool, now we can move on to more important things…

2. Create a Facebook App

Since you are now a verified developer, you can continue to create a Facebook App. The first thing you’ll see is a little popup so you can indicate the name of your app.
Create a Facebook App
App Display Name is simply the name that is displayed for others to see and the App Namespace is used for Open Graph and Canvas Pages. Do NOT sweat this stuff because we are not really building an actual App and we don’t need to display anything to anybody. Just come up with a name that represents what we’re doing so you can quickly identify it in the future.
Good example: “your website comments”.
And we need to make sure these names are valid and available, as you can see in green text on the previous image. If they’re not, just come up with something different.
Your App ID
This will give you the most important piece of information you will need: your App ID and your App Secret. Save them for your records.
Your App ID
Configure your App
Now we just need to do a little configuration for your App. On the same page, scroll down to the “Basic Info” section. Since we already have a Display Name and a Namespace, all we need to add here is the contact email and the App Domain, which is your blog’s domain (yourdomain.com) without the “http://”.
Facebook App Configuration
Scroll down a little more to the section “Select how your app integrates with Facebook”. Select “Website” and add your blog’s URL, this time including the “http://” so it looks like this: “http://www.yourdomain.com”.
Your blog's integration to Facebook
Save Changes. And we’re done configuring the Facebook App. Congrats!

3. Get Your Code

Now we’re going to a different section on the Developer’s site. Click here so you can get your comments code. If you’ve added the Like button or the Like Box on your blog, you’ll probably be familiar with how this tool looks. If you’ve never seen this, don’t worry, this is very easy.
First thing is to configure how the comment box is going to look on your blog:
  • Start by adding your blog’s URL again (http://www.yourdomain.com)
  • Specify the number of comments you want to display on your blog post
  • Set the width of the box depending on how wide the content area is on your blog
  • The “Color Scheme” will usually stay as “Light” unless you have a dark background on your site and prefer to go that way
The section on the right of the screen (see image below) gives you a preview of how things are going to look once you install on your site. As soon as you’re happy with it, click on “Get Code”.
Facebook Comments Tool
And a new box will pop up, this one is to grab your code but before you do:
  • You get 2 options for code: HTML5 and XFBML. My preference is HTML5
  • And very important, Select the correct App from the dropdown menu, specially if you have more than one
Facebook Comments Code
Now you’re ready to copy the code from the first box, there is no need to change anything since Facebook already integrated the App ID in the code for you. Your code should look a little something like this:
<div id=”fb-root”></div>
<script>(function(d, s, id) {
var js, fjs = d.getElementsByTagName(s)[0];
if (d.getElementById(id)) return;
js = d.createElement(s); js.id = id;
js.src = “//connect.facebook.net/en_US/all.js#xfbml=1&appId=[YOUR APP ID]“;
fjs.parentNode.insertBefore(js, fjs);
}(document, ‘script’, ‘facebook-jssdk’));</script>

4. Adding the Code to your Site

Two more steps and we’re golden.
Now we are going to have to paste this code into your PHP code, inside your “header.php” file to be more exact. I know it sounds like we’re stepping into another dimension but it’s actually pretty easy. Stay with me…
There are two ways you can do this, if you’re comfortable connecting and managing files on your server via a FTP Client you can do that. Connect to your server and locate the “header.php” file.  
The second option is from your WordPress Dashboard. This sounds more human, right? Most themes have a section called “Editor” under the “Appearance” tab on the left menu. Again, that’s WordPress Dashboard > Left Menu > Appearance > Editor.
Wordpress Editor
On the right side of your screen you’ll see a list of all the theme files, find and click on “Header (header.php)”, that will display the actual code in the file in the center of your screen.
Now, paste your piece of code right after the <body> tag as shown in the following image.
Insert Facebook code into your theme
Save when you’re done.

5. Adding the Facebook Code to Your Comments

Let’s go back to Step 3 to grab the other code from Facebook which should look like this:
<div data-href=”http://yourdomain.com” data-num-posts=”10″ data-width=”550″></div>
In this case we do need one minor tweak. What happens with this code is that Facebook is providing it ready to work for that specific domain but, what we want to do is install the comments on every post in our blog. So we’ll replace the section that contains your domain (http://yourdomain.com) for this: <?php the_permalink() ?> and now you’re code will look like this:
<div data-href=”<?php the_permalink() ?>” data-num-posts=”10″ data-width=”550″></div>
That will do the trick. Now your Facebook Comments will automatically appear on every blog post you publish.
We need to go back to our WordPress Editor now. Locate the file named “comments.php” from the menu on the right.
Add Facebook Comments code into your blog posts
In this case the positioning of our code really depends on where we want the comment box to go, I wanted them on top of the WordPress native comment system so that’s where I placed it (above image).
Don’t forget to save.
And with that, we are done. No high fives yet…

Results

It’s the moment of truth, we need to go to our site and see if the Facebook Comment Box is showing up in our posts. And this is what you should see:
Facebook Comments in your blog posts

Let’s Test It!

Let’s test the comment system just to make sure everything is working properly. First just add a comment right there in your blog post and make sure you checkmark the “Post to Facebook” option right below the comment box.
Testing your Facebook Comments
Now check if the comment is displayed on your Facebook Timeline.
Facebook Comments on your Wall
As you can see, besides the comment, the post image, headline, and the meta description for the post are also displayed on the Facebook Timeline. Very similar to a share. Shiny!
Reply from the Timeline
Now try interacting with that same comment right from the Timeline to see if it also gets displayed on the blog post page. In this example, I’m replying with my wife’s account, check it out.
Reply from the Facebook Timeline
And back to your blog post, things should be looking like this.
Facebook reply on your blog post
And now you have a conversation about your post that is happening in two different places. Isn’t the Internet beautiful? I think so too…
Authentication
Remember, if the user is not currently logged into his/her Facebook account, they will be presented with the option to sign in right from your blog post. So let’s sign out of Facebook and go back to your post to see if this works.
Facebook authentication from your blog post
Now you’re rocking Facebook Comments on your blog posts.
Friday, January 24, 2014

Adding a gadget to your blog, using Blogger's WYSIWYG interface

This article shows how to use Blogger's add-a-gadget tool.  

It also looks at how you can move a gadget around in your blog, and describes what you can do with some of Blogger's most-popular gadgets.


Gadgets and types of Blogger template


Previously, I've explained what gadgets (ie widget) are, and the advantages and disadvantages of each method of adding one to your blog, and how to add a gadget to a blog with a dynamic-view template.

This artile looks at the details of using Blogger's own add-a-gadget tool, how exactly to use it, and how to change the placement of gadgets in your blog.

This is more in-depth than the dynamic templates article, and applies mainly to blogs with layout and designer templates.  The same general approach is used for dynamic template blogs, but they do have some features  that aren't discussed here (eg a limited range of gadgets that actually work).

In-post, and HTML-code gadget:

The tool described here lets you put a gadget in any of the "gadget areas" in your blog.   The options are a little different if you want to put a gadget right inside a blog-post.

Also, there are reasons why you might prefer to get the HTML-code for a gadget, and install it like you install any other code to your blog.   Read more about the reasons for using HTML-gadgets and places to get code that's equivalent to Blogger's official gadgets.


How to use Blogger's Add-a-gadget feature

In post-Sept-2011-Blogger (ie the new UI): go to the Layout tab
OR
In pre-Sept-2011-Blogger (ie the old UI): go to the Design > Page elements tab


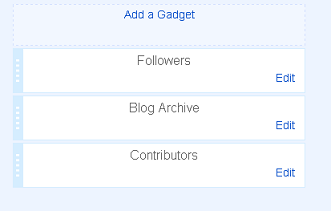
The Add a Gadget links on the screen shows you all the places that you can currently add a gadget.  Choose which place to add one to to.
(You can make it possible to add gadgets to other places see How to add a gadget above your header, or Adding a new footer section to your template for ideas on how to do this.)


Click the Add a gadget link at the top of the area you choose.


The format of the Choose-a-gadget  that opens is being updated to the look like new interface.

I suspect it's not quite finished yet, so the it may look a little different to what's shown in this picture.

But the main contents should be the same.


Choose a gadget from the list, or one of the tabs:
  • You may need to scroll down the list to find the one you need.
  • Do not use the search tool in the list to find the gadget that you want - it sometimes doesn't work correctly and only shows gadget from 3rd parties and not the official ones from Blogger.
  • Every gadget in the list has a source: some are from Blogger.com. Some are from other recognised companies (eg Amazon.com), But some are from individuals, just like you and me. The danger with using a 3rd party gadget from this list is that you have no way of looking at the code behind it, so you cannot decide if it's safe or not.

    I recommend only choosing gadgets from Blogger.com, or other well known companies.
Select the gadget by clicking the small blue plus sign beside the name.


This opens the gadget configuration screen, where you enter the details of how you want the gadget to work.

Every gadget needs different details.

For example, in the Popular Posts gadget, you must choose
  • to list popular posts since statistics started, or the last 7 or 30 days
  • whether to show the image thumbnail
  • whether to show the post snippet
  • how many posts to show

When you have entered the parameters, click Save.

This takes you back to the blog-layout screen.  The new gadget is at the top of the list of gadgets in the area where you put it. If you gave it a title, then this will show up. But if you left the title blank, the screen just shows the gadget type.


Use the Preview button to see what the front page of your blog will look like with the gadget added.

Change the position of the gadget if you want to (see the next section if you need help with this).

Once you are happy with the gadget and its position, click Save to apply it to your blog.


How to change the position of a gadget:

You can move a gadget (new or existing) into any place in your blog-layout that you can add a gadget to.   In the Layout (Design > Page elements) screen:
  1. Single-click on the gadget and hold the mouse button down.   Keep holding it down.
  2. Dragging the mouse moves the gadget to other places, including further down the list of gadgets currently in that space, or into a totally different part of the blog.
  3. Once the gadget is in the place where you want it to be, let go of the mouse-button.

Once you are happy with the position of all the gadget, click Save (in the old Blogger) or Save arrangement (new Blogger) to apply the new places to your blog.

Can you put Posts onto Pages in Blogger?

Ever since Google introduced "pages" into Blogger, people have complained that their posts all go onto the "home page", and asked how to put posts onto different pages in their blog.


The standard, but unsatisfactory, answer is
"Sorry, that's not how Blogger works.   So called "static" pages in Blogger are meant to be used for reference information that doesn't change often, which you don't want to be part of your regular post-feed, but which you do want users to have easy access to."

Basically, this is part of the difference between post and pages.


Follow these steps:

1   Add Categories

Categorise your posts by adding Labels to them.   (Either all of them, or just the ones that you want to show up on specific "pages".)


2 Make a "pages look alike" menu bar:

There are (at least) are three ways of doing this - choose which ever one suits your blog best:

a)   With a Labels Gadget:    

Use the usual add-a-gadget approach to put a Labels gadget into the spot where you would put the Pages gadget if you wanted to make a horizontal menu bar with it.

If your blog has some Labels that you don't want to have "pages" for, then set it to show only some of your Labels:

         b)   With a Linked-list gadget:   

Use the usual add-a-gadget approach to put a Link-list gadget where you would put the Pages gadget if you wanted to make a horizontal menu bar with it.
Add a link to the list for each Label that you want a "page" for.   The HTML to use for each Label value is

http://YOUR-BLOGS-URL/search/label/THE-LABEL-NAME

You can also add other items (eg individual Posts, or even Bllogger's static "pages" if you really must have them - see why I don't like them!) - see the menu bar at the top of this site for an example of this.


c)   With a Pages gadget:   

Use the usual add-a-gadget approach to put a Pages gadget into the menu bar area.
Use Label-links described above the Linked-list gadget option, as website links to add to your Pages gadget.
Due to the increasing importance of mobile templates, this is now the option that I recommend, because the pages-gadget does automatically appear on mobile-templates

3   Deal with the home-page

If you don't want your posts to appear on the "home page" was well as the topic pages, then there are two options:

OR

  • Give your blog a "home page" using the custom-redirect option discussed in this post.


Job Done

It really is that simple.  Your readers can now click on the "pages" in your blog from a "menu" at the top, and see a list of posts for the Page that they chose.

Even better, if some posts relate to more than one topic, they show up on both of the relevant pages.    And if you have used the Pages gadget, your blog is well set-up to work with a mobile-template - which is something that is getting more important every month.

Don't forget to test your blog, to make sure that the menu bar is working how you expect it to and that it looks OK, in all the browsers that your readers are actually using.

Add Facebook Comments Box To Blogger Blogs - New!

In 2009 Facebook developers introduced their best social plugin called "Facebook Comments Box". This plugin can be embedded in any website or blog and visitors can use their IDs of Facebook, Yahoo, AOL or Hotmail to leave a comment at your site. This plugin did show a lot of problems when it was embedded in Blogger Blogs in initial days of its development but now thanks to our fellow friend Max from Allblogtools this plugin has been finally bloggerized to work just perfect with any Blogger hosted blogs. I have edited Max's coding in some areas and have mentioned some more interesting options that will help you use the Facebook comments box in parallel to your old Blogger Comment form so that you may loose no previous comments and provide users with multiple options of commenting from different platforms.


Live Demo

This is how the Facebook Comments box looks like,
LIGHT SCHEME
facebook-commentS-box LIGHT
DARK SCHEME
Facebook-comments-dark-scheme

Interesting? Lets now learn how to embed this extremely useful comment form in Blogspot blogs. Kindly follow the simple steps below,

1- Get a Facebook Application ID

  1. Go To Facebook Developers Page
  2. Submit your blog URL and give it a name. Keep Site name as your "Blog Title" and Site URL as your "blog address"
site-url
     3.   Hit "create app" button and proceed
     4.   After submitting the security check code you will see this page,
app-id
       5.   Save that App ID in a notepad because we will need that latter. Now Click the link near the top-right corner of the same page that says "Developer Dashboard"
image
      6.  One the new window that appears click the Edit Settings link ,
edit-settings
        7.  Then go to Website option and write your Site Domain as blogspot
website
       8.  Save Changes and jump to the next step of this tutorial

2- Adding the Facebook comments Box to Blogger

Now its time to do embed the comments box in your blog templates. So follow these easy steps,
PS: Please make sure your blogger comment form is embedded below posts. For doing this first go to Blogger > Settings > comments > and then choose embed comments below posts. After doing this follow the tutorial below.
  1. Go To Blogger > Design > Edit HTML
  2. Backup your template
  3. Check the "Expand Widget Templates" box
  4. Search for <html and just after it give a space and add this code,
xmlns:fb='http://www.facebook.com/2008/fbml'
  5.  Next search for 
<body>
Note: In New Blogger Designed templates the same code looks like this,
<body expr:class='&quot;loading&quot; + data:blog.mobileClass'>
Find any one of these codes and just after it paste the code given below,
<div id='fb-root'/>
<script>
    window.fbAsyncInit = function() {
    FB.init({
      appId  : &#39;YOUR_APP_ID&#39;,
      status : true, // check login status
        cookie : true, // enable cookies to allow the server to access the   session
      xfbml  : true  // parse XFBML
    });
  };
    (function() {
    var e = document.createElement(&#39;script&#39;);
      e.src = document.location.protocol +   &#39;//connect.facebook.net/en_US/all.js&#39;;
    e.async = true;
      document.getElementById(&#39;fb-root&#39;).appendChild(e);
    }());
</script>


  • Replace YOUR_APP_ID with your Facebook application ID that you saved in a notepad.
    6.    Next search for  </head> and just above it paste the following code,
<meta expr:content='data:blog.pageTitle' property='og:title'/>
<meta expr:content='data:blog.url' property='og:url'/>
<meta content='MY Blogger Tricks' property='og:site_name'/>
<meta content='BLOG-LOGO-IMAGE-LINK' property='og:image'/>
<meta content='YOUR_APP_ID ' property='fb:app_id'/>
<meta content='http://www.facebook.com/mybloggertricks' property='fb:admins'/>
<meta content='article' property='og:type'/>


Make these changes:
  • Replace MY Blogger Tricks with your blog title/Name.
  • Replace BLOG-LOGO-IMAGE-LINK with the image link of your logo. Your logo will look good if it is in gif format and having this size ->  40px by 40px . This logo will appear next to your post title on Facebook profiles of your visitors like this,
logo
  • Replace YOUR_APP_ID  with the your Facebook Application ID that you saved in notepad
  • Replace http://www.facebook.com/mybloggertricks with your Facebook user profile link
    7.    Now Search for this,
<b:includable id='comment-form' var='post'>
    8.    Just after it paste the code given below,
<b:if cond='data:blog.pageType == &quot;item&quot;'>
<div style='padding:0px 0px 0px 0px; margin:0px 0px 0px 0px;'><script src='http://connect.facebook.net/en_US/all.js#xfbml=1'/>
<div> <fb:comments  colorscheme='light' expr:href='data:post.url' expr:title='data:post.title' expr:xid='data:post.id' width='520'/></div>
<div style='color:#fff; background-color:#3B5998;border: solid 1px #ddd; font-size:10px; padding:3px; width:510px;'>Facebook Blogger Plugin: Bloggerized by <b><a alt='blogger templates' href='http://www.allblogtools.com/' style='text-decoration:underline; color:#fff;' target='_blank' title='blogger templates'>AllBlogTools.com</a></b> Enhanced by <b><a alt='blogger widgets' href='http://www.mybloggertricks.com/' style='text-decoration:underline; color:#fff;' target='_blank' title='Blogger Widgets'>MyBloggerTricks.com</a></b></div></div>
</b:if>
  • If you want to use the dark scheme then simply replace light with dark
  • To change the Comments box size, change this value width='520'
  • To change the footer credits size, change this value width:510px
  • Keep a difference of 10 pixels between the box size and footer size. For example if you set box-size to width='600' then set footer-size to width:590px

      9. Save your template and Bingo you are Done! See your blogs to find a beautiful comment box waiting to be touched. =)

Create and Style Differently Your Demo Page

Many bloggers have abilities to write good tutorials for their readers. Those article are also perfectly sticking the readers when they successfully describing the subject with few examples, attaching a downloaded file, and bringing to lively part through a demo page.

Let's talk about demo page which is a single HTML page that shows the end result from your tutorial. This demo page should be clean and simple as possible but still has its own characteristics to maintain readers experience within your blog.

This topic may not suitable for people who use self-hosted platform. I believe they are able to host anything they wanted. I was looking any best method to style my demo page for this Blogger blog. Worth to mention, the best trick is using Blogger static page. So that we can easily reset the default stylings by adding NEW STYLESHEET within conditional tag in our template.

<b:if cond='data:blog.pageType == "static_page"'>
<style type='text/CSS;'>

... YOUR NEW CSS ...

</style>
</b:if>

Beside we can preserve our main theme, the static page will not be indexed which is good news (web users will not find this page unless from the link provided in our tutorial). Unfortunately, it's limited to 10 pages only.

Next option is finding free hosting service for all my demo pages. I hesitated with this way because the page's address will be totally irrelevant.

Lastly, I decided to overwrite all default stylings through Blogger post editor. Basically, we can do a lot with this method which is only targeting for single post, as long as we know how most browsers render a web page.


From the examples, you may noticed I'm still able to maintain my theme and employ same files that being used in my blog to avoid additional HTTP request. Most of the main default elements are hidden. How to do?

From your post editor (Edit HTML mode), just include your NEW CSS PROPERTIES like below (this only a brief example);

<div style='display:none;'>
<style type='text/CSS;'>

#menu, #sidebar {
    display: none;
    }

#main-wrapper {
    width: 100%;
    }

... AND SO ON ...

</style>
</div>

However, there are several downsides with this method. Because the demo page is actually a post that stay in the archive, It will be indexed by the time we published it. So chances it will appear in query result is there especially when a reader uses the search bar in our blog. What's the big deal?. Our layouts will be messed up just like 2 CSS sheets has been merged. My advices are;

  • Don't put any label.
  • Set the published date 2-3 years back.
  • Avoid typing any expected keywords.


That's all. Please tell me if you know other approach for doing this. Hopefully together we can improve our Blogger blogs.

5 Well Designed Blog Comment Section

Most of bloggers enable comment section to create online conversation. When a reader leaves a feedback, it's just like he or she feels comfortable and enjoy with the subject. Sometimes it's obliged for commentators to join in based on their knowledge and experience. So, it's quite important not to ignore this section when seeking further information.

Concerning who don't have patience and always reluctant to read entire thread (because of some reasons), I think this section needs more attention to create more pleasing view to them. So, below are the best examples (in my opinion) of threaded comment area that have been well designed by the authors.


CSS-Tricks


csstricks thread


Freelanceswitch


freelanceswitch thread


Line25


line25 thread


Noupe


noupe thread


Webdesignerwall


webdesignerwall thread

widget to be added on your blog, which shows the posts where recent comments have been made.

To add the widget, follow these steps:
Log in to your Blogger account. Then go to Layout -> Add a Gadget -> HTML/Javascript
Now copy and paste this code in to the widget:


<script style='text/javascript' src='http://files.main.bloggerstop.net/uploads/3/0/2/5/3025338/recent_comments.js'></script><script style='text/javascript'>var a_rc=5;var m_rc=true;var n_rc=true;var o_rc=100;</script><script src='http://bloggerstop.net/feeds/comments/default?alt=json-in-script&callback=showrecentcomments'></script>
<br/><span style="font-size: x-small;"><a href="http://bloggerstop.net">Blogger Widgets</a></span>

NOTE: Replace the text highlighted in RED (bloggerstop.net) with your own blog address (EXAMPLE.blogspot.com)

Total Number of Posts and Comments - Blogger Gadget

Here's another simple widget for your blog. With this widget, you can show your live stats (total posts and comments on your blog).
You may change the phrases "Total Posts" and "Total Comments" and the color of the font too.
Follow these instructions to add a similar widget to your blog:
Log in to Blogger, go to "Layout", click on "Add a Gadget", and select it as "HTML/JavaScript" type. Now add this code to the widget:

<script style="text/javascript">
function numberOfPosts(json) {
document.write('Total Posts: <b>' + json.feed.openSearch$totalResults.$t + '</b><br>');
}
function numberOfComments(json) {
document.write('Total Comments: <b>' + json.feed.openSearch$totalResults.$t + '</b><br>');
}
</script>
<font color="red"><script src="http://bloggerstop.net/feeds/posts/default?alt=json-in-script&callback=numberOfPosts"></script>
<script src="http://bloggerstop.net/feeds/comments/default?alt=json-in-script&callback=numberOfComments"></script></font>

Replace the code in red with your blog's address.
And you may change the code highlighted in blue to modify the appearance of this widget.

How to Add a Contact Me Page to your Blog or Website: Google doc


Turns out to be quite simple using Google docs! Here are the steps:

  1. Go to Google docs
  2. Create a new form

  3. Customize the form to your liking by filling it with required info (Name, email, website, message...)
  4. To add new items use the "Add item" button on the upper left. Use this to add more entries. For the message, add a paragraph text.
  5. Finally, here's how it could look like. Don't forget to name the form and put in a short description
  6. Now, you can get the code to embed that form in your website or blog. Just go to the "More actions" button on the upper right and choose embed.
  7. Copy the embed code to your website or blog. In blogger, you can create a new page for that form and embed the code in it. See how it looks like on mine.
This form will automatically create an associated spreadsheet in your Google docs where it can store all the submissions going through the form. You will want to be notified of those submissions via email for example. To set this up, here's what you do
  1. While still editing the form, choose "See responses -> Spreadsheet"
  2. In the spreadsheet, go to: "Share -> Set notification rules" and specify how you wish to be notified
Happy Blogging!

Contact Me Widget for blogger, Wordpress or Custom Website


Kontactr is a one-click free contact form service. With Kontactr, you can fight against the amount of spam that you receive daily. Protect your email address by using this highly secure contact form. All you need to do is sign up for a free account and your users will be able to email you right from your website.  This blogger widget will definitely be a great addition to your blog!

Contact me

  1. Embedded on a webpage version [check mine out].
  2. Sleek Pop up version [check out the button above]
Get this widget

Floating Twitter and Facebook Share Buttons (Widgets with Counter)

Here is an excellent widget that will float vertically next to your individual blog posts.  These  engaging buttons will allow your visitors to easily share your content on facebook, twitter, google plus, etc.  The great thing about this widget is that it counts the number of times your posts are shared on each social network.


Add Widget to Blogger

  1. Go to Blogger > Template
  2. Backup your template
  3. Click Edit HTML
  4. Click Proceed
  5. Then Click Expand Widget Templates
  6. Search for this code:


and below it paste the following code.

Add Widget to Website

Just place the code above anywhere between the body section of your template. The widget will appear where the code is placed.

Customization

Replace the code below with your own twitter username.

Floating Facebook Like Box Widget For Your Website

Are you struggling to get more facebook likes? Add a floating facebook like box to your blog or website.  The widget remains in a fixed position on the right-hand side of your site.  When you hover over the blue facebook image, the like box will then slide and reveal itself using jquery.

View Demo

You can see a demonstration of this facebook widget on the right side of this page. Hover over the facebook image with your mouse. A facebook like box should appear.

Add Widget to Your Site

Step 1
Add the following code anywhere in the body section of your template.

Step 2
If the floating facbook widget is not working properly after step 1, then you need to add jquery to your site. Follow the instructions below.
  1.  Go to Design>Edit HTML
  2. Search for <head> and just below it paste the following JQuery code. 

How to Customize

Where to find the code?
In order to find the html go to the blogger dashboard>Layout. Click "edit" on the "HTML/Javascript" gadget.

Enter your facebook username
Search for the line of code below and replace theblogwidgets with your own facebook page username. If you don't have a username you can easily create your own here.

How May I Help You?

If you're still having problems with the getting the facebook box to display properly, let me know.  Comment below and I will be happy to assist you.
Cheers!

Facebook Popup (Like Box Widget) : A great way to connect your visitor with you socia media site

Here's a fantastic way to increase facebook likes for your blog or website.  Add this enticing widget to your site and a facebook like box will pop up with the lightbox effect when a user visits your page.  The facebook widget will show up on your page about 20 seconds after the page loads (but can be customized).  This is a surefire way to dramatically increase your likes.

Add Widget to Your Site

Add the following code anywhere in the body section of your template.  For Wordpress themes, Weebly templates, and Tumblr, you will need to manually copy and paste the script into your template.  

How to Customize

Where to find the code?
If you've installed the widget by clicking "Add to Blogger" you'll need to locate the code in order to make customizations. In order to find the html go to the blogger dashboard>Layout. Click "edit" on the "HTML/Javascript" gadget.

Enter your facebook username
Search for http://www.facebook.com/theblogwidgets and replace it with your site's facebook page URL.

Change the 20 Second Time Delay
By default the widget pops up 20 seconds after the page finishes loading.  Search for the code below and change the number 20000 to a greater or lesser number.
1 second = 1000.  10 seconds = 10000. 60 seconds = 60000.

Popup every time the page loads 
By default, the like box widget only shows up the first time the user visits your page.  If you would like the facebook box to popup every time the page loads, then remove this line of code:

Display only when user visits your homepage
You can do this by surrounding the widget code with these conditional tags below. Go to Template Edit HTML. Now search for the </body> tag. Place the facebook popup widget right above this body tag.  Make sure to include the conditional tags below.

Having trouble seeing the facebook widget?

By default, this facebook like box widget is only displayed once every 30 days. You may need to delete your cookies if you would like to see it again.  Or check out the "How to Customize" section above, in order to display the widget every time a user visits your site.

If you're still having trouble with the popup widget, please leave a comment below.  I am happy to help you!

Another Facebook Like Box Widget...

You should also check out the Floating Facebook Like Box.  Conveniently located on the right side of the web page; your visitors will be able to like your facebook page at any time.